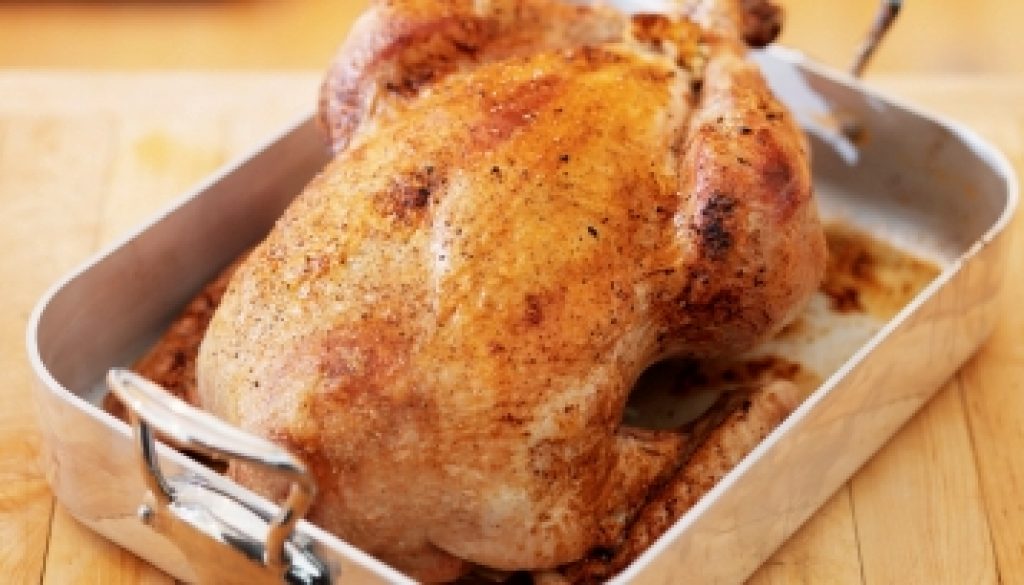
How to cook a whole chicken on a BBQ

Don’t limit yourself to cooking chicken on the BBQ in pieces! By barbecuing a whole chicken you can not only save some money but you will get to enjoy crispier skin, juicier meat, and feed the whole family.
Cooking chicken on a BBQ: The Butterfly Effect
Most of you keen cooks will be familiar with the butterfly technique as a popular way to prepare chicken breast meat. Here we will teach you step by step how to apply this technique to a whole chicken and barbecue this dish with flying colours!
Step 1: Bring the chicken to room temperature by covering it and leaving it on your kitchen counter for about half an hour. This ensures that the chicken stays juicy throughout grilling. Once it’s been rested, use paper towels to pat it dry for crispy skin!
Step 2: Keeping the chicken on its front, cut straight down the back of the chicken and pull it open to butterfly it. You can keep the chicken on its back if you prefer, but this way you will retain the moisture in the breast meat.
Step 3: Preheat your BBQ as usual, and while it’s warming up, rub a light layer of oil over the surface of the chicken, or coat it using spray oil. Once oiled up, you can season the chicken with whatever BBQ rub you enjoy.
Step 4: Once at optimum temperature, place your whole chicken on the grill. Depending on size, cooking the chicken on the BBQ will take about 1.5 hours, so aim to spend 1 hour with the chicken facing bone down and half an hour breast side down. We also recommend that you baste it every 10 minutes or so with lemon juice.
Step 5: When your chicken is browning and looks good enough to eat, you will need to use a meat thermometer to check it’s cooked through. If it reads 160’F in the breast meat and 170’F in the thighs, it is cooked sufficiently and you can enjoy it straight from the barbecue or let it rest in foil and enjoy it later.
Take it for a Spin
Spit-roasting a chicken using BBQ rotisserie chicken recipes you found online is probably the easiest way to ensure that you aren’t just having a stab at it, and that your chicken cooks evenly. Here’s how to create great rotisserie chicken without going round in circles:
Step 1: Season your whole chicken inside and out with simple salt and pepper, and rub any other seasonings or herbs under the skin using your fingers. If seasoning with herbs you may even want to stuff some sprigs into the cavity of the chicken at this stage.
Step 2: Prepare your BBQ to a medium-high heat. If you have a charcoal BBQ, you will need to rake the coals to the sides of the grill and place a drip pan with ½ inch water in the fire bed. If you cook on Gas, grill the chicken on a medium-low heat. Once your BBQ is prepared, thread your whole chicken onto the spit and secure it according to the manufacturer instructions. Start the rotisserie motor and cover the grill until the skin is brown and thigh juices run clear when pierced. The chicken will take between 45 and 75 minutes to cook depending on its size.
Step 3: To be sure that your chicken is cooked through and safe to eat, insert an instant read thermometer into the thickest part of the thigh away from the bone, and check it is 170’F. Once you’re happy that this is the case, transfer the chicken to a carving board, cover it with tin foil and rest for 10 minutes before serving.
You can find some great BBQ rotisserie chicken recipes online. To save you time, check out this standard rotisserie recipe here!
Yes you Beer-can!

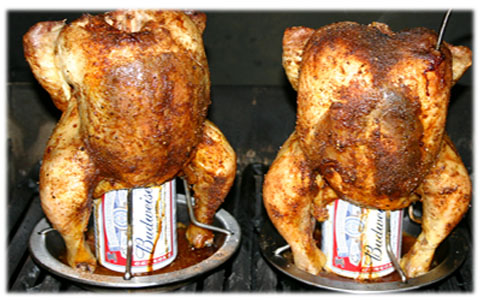
Even if you’ve never tried it, it’s likely that you’ve heard about Beer Can Chicken on the grapevine. Here we’re truly saving the best ‘til last as Beer-can chicken is not only one of our favourite ways to cook a whole chicken on a BBQ, but it’s one of our favourite ways to BBQ full stop! Beer haters need not fear as this recipe can be adapted to use whatever drinks you like best and always results in juicy, flavoursome meat.
Step 1: Prepare your BBQ for indirect grilling by leaving charcoals at just one side of the grill or on gas BBQs only firing up one half of the burners.
Step 2: Wash the giblet-free chicken inside and out then pat dry with paper towels. Using your fingers separate the skin from the meat of the bird and massage in your preferred seasoning or BBQ rub, then replace the skin and rub a tablespoon of oil over the entire chicken body. You can then add more spice over the top of the skin if you want to.
Step 3: Wash the outside of your beer can or your preferred canned drink, open it and remove around half of its contents (drinking the rest is recommended!) You can even experiment with sprigs of herbs or cloves of garlic in the can too. Once ready to go, carefully lift the chicken and place the cavity over the upright beer can. If you want to try the recipe with wine or other un-canned drinks, it might be worth investing in a poultry roaster where the can is built in to fill with whatever you fancy.
Step 4: Place your beer can chicken on the cool side of the BBQ grill and use the legs and beer can to make sure it’s stable before closing the lid. Once the BBQ is covered you need to leave it for at least an hour without even checking on its progress. After this time you can check the chicken and refresh the coals if you need to then keep checking every 15 minutes or so. The easiest way to see if it’s done will be using a meat thermometer in the thickest part of the thigh- it will need to read 165’F.
Step 5: Once you’re happy that the chicken is cooked through, use a metal spatula and tongs to carefully remove it from the BBQ and onto a tray or pan. Remember that the can and its contents will be extremely hot! Let the chicken rest for 10 minutes before removing the beer can, and then it is ready to serve up and enjoy!
So there you have it, a few great ways of cooking chicken on a BBQ. Next time you’re grilling, give these a go!
